| More about Trimps: | |
|---|---|
| Exploration: | Helium Universe • Radon Universe • Maps • Unique maps • Unlocks • Imps • Story • Loot |
| Basic Information: | Trimp (species) • Resources • Structures • Jobs • Upgrades • Equipment • Settings • Combat |
| Long-term Gameplay: | Helium/Radon • Perks • Heirlooms • Formations • Mastery • Achievements • Liquification • Fluffy/Scruffy |
| Gameplay Changes: | Portal • Challenges • Void Maps • Challenge²/Challenge³ • Player's Spire • Spire Assault |
| Anomalies: | Broken Planet • Corruption • Spire • Magma • Empowerments of Nature • Obsidian • Mutated zones |
| Other Useful Info: | Guides • Calculators • Changelog • Mods |
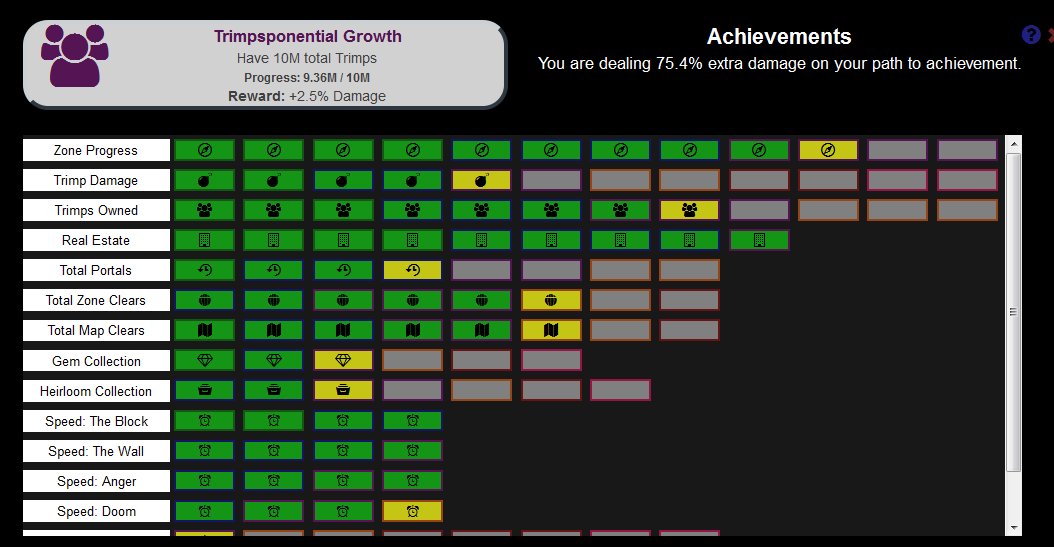
The in-game list of all Achievements can be accessed through a button in the bottom bar.
Each achievement earned gives a set amount of additive damage%. The current total summed up gain from all achievements can be observed in the achievement screen, as well as on the trimps damage breakdown. Reaching 15% damage bonus from achievements unlocks Golden Upgrades.
There are 377 achievements in total, with maximum damage bonus achievable from all achievements (including hidden) being 68500%. (Final damage multiplier: x686)
Interface[]
Achievements are divided into categories. Newly earned achievements have a yellow (!) icon next to them, and have to be moused over for the icon to go away. When moused over, the description of each visible achievement can be viewed in the top-left. Only completed achievements and an achievement after the last completed one in a category can be viewed; the rest of them are locked. The exception are speedrun achievements, whose descriptions can always be viewed, and feats of strength (Feats), which can be viewed once their goalpoints are initially reached.
Achievement boxes are colored gray if they are locked, yellow with stripes if they are available, green if they are completed, and (for Feats/Humane Run) red with stripes and an X icon if the achievement cannot be obtained during that run.
When an achievement is earned, a pop-up is displayed on the screen which can be clicked away with the red X icon, or open the achievement screen with the green newspaper icon. If a new achievement is earned while the pop-up is on the screen, it's replaced with a pop-up for the new achievement.
Tiers[]
Achievements are divided into Tiers, which resemble their relative difficulty. The damage bonus received from completing an achievement depends on its tier, as per the table below:
|
Tier |
Color |
Damage bonus |
Estimated Zone of Completion |
|---|---|---|---|
| Tier 1 | Green | 0.3% | 1 - 20 |
| Tier 2 | Blue | 1% | 21 - 60 |
| Tier 3 | Purple | 2.5% | 61 - 100 |
| Tier 4 | Orange | 5% | 101 - 150 |
| Tier 5 | Red | 10% | 151 - 200 |
| Tier 6 | Pink | 20% | 201 - 250 |
| Tier 7 | Teal | 40% | 251 - 300 |
| Tier 8 | Salmon | 80% | 301 - 600 |
In addition, the following tiers of achievements use CSS, as per the table below:
| Tier | CSS background style | Damage bonus | Estimated Zone of Completion |
|---|---|---|---|
| Tier 9 | linear-gradient(to top, #2286ad 0%,#000000 30%,#661310 50%,#000000 80%,#2286ad 100%) | 160% | 601 - 700, U2 1 - 10 |
| Tier 10 | linear-gradient(to top, #bd6543 0%,#661310 30%,#a18900 50%,#661310 80%,#bd6543 100%) | 250% | 701+, U2 11 - 50 |
| Tier 11 | linear-gradient(to top, #551555 0%,#35a5a5 30%,#1900ff 50%,#35a5a5 80%,#551555 100%) | 400% | U2 51 - 100 |
| Tier 12 | linear-gradient(to top, #620f0f 0%,#d58565 30%,#951545 50%,#d58565 80%,#620f0f 100%) | 750% | U2 101 - 150 |
| Tier 13 | linear-gradient(to top, #880588 0%, #4b2850 15%, #067c21 30%, #b300ff 45%, #060754 50%, #b300ff 55%, #067c21 70%, #4b2850 85%, #880588 100%) | 1200% | U2 151+ |
The "Estimated Zone of Completion" corresponds to the approximate time one will be able to earn the achievements comfortably, once your Highest Zone Ever is within the specified bounds. Note that this is a rough guide and not absolute.
Total damage gains[]
Below is a table showing total damage gain from completing all achievements of a specific tier. These include Hidden achievements as well.
| Tier | Total number of achievements (selected tier only) | Total damage gain (selected tier only) | Total damage gain (cumulative) |
|---|---|---|---|
| Tier 1 | 20 | 6% | 6% |
| Tier 2 | 34 | 34% | 40% |
| Tier 3 | 34 | 85% | 125% |
| Tier 4 | 31 | 155% | 280% |
| Tier 5 | 36 | 360% | 640% |
| Tier 6 | 33 | 660% | 1300% |
| Tier 7 | 37 | 1480% | 2780% |
| Tier 8 | 38 | 3040% | 5820% |
| Tier 9 | 23 | 3680% | 9500% |
| Tier 10 | 20 | 5000% | 14500% |
| Tier 11 | 24 | 9600% | 24100% |
| Tier 12 | 24 | 18000% | 42100% |
| Tier 13 | 22 | 26400% | 68500% |
Fluff level[]
The heading text in the achievement screen "You are dealing x% extra damage" is followed by a specific random message, which depends on your current damage bonus:
| Damage bonus | List of possible lines | Golden Upgrades |
|---|---|---|
| under 15% |
|
Locked |
| under 100% |
|
Every 50 zones |
| under 300% |
|
Every 45 zones |
| under 600% |
|
Every 40 zones |
| under 1000% |
|
Every 35 zones |
| under 2000% |
|
Every 30 zones |
| under 10000% |
|
Every 25 zones, extra every 500% |
| under 50000% |
|
Every 25 zones, extra every 2000% |
| over 50000% | Every 25 zones, extra every 10000% |
In addition, if your total achievement bonus is over 2000%, you will start off with 1 extra Golden Upgrade for every 500% damage bonus at the beginning of every run. So if you have a total of 3000% achievement bonus, you will receive 2 extra Golden Upgrades at the beginning of every run. Once the achievement bonus exceeds 10000%, extra Golden Upgrades are given for every 2000% damage bonus until a total of 50000% bonus, then further extra Golden Upgrades are given for every 10000% damage bonus.
As of 5.5, if all achievements are acquired, the player will gain a Golden Upgrade every 25 zones, plus an additional 37 Golden Upgrades at the start of every run.
List of all achievements[]
U1 Achievements[]
Zone Progress[]
| Achievement | Requirement | Tier |
|---|---|---|
| This is Easy | Complete Zone 2 | Tier 1 |
| Blimp Slayer | Complete Zone 5 | Tier 1 |
| Groundbreaker | Complete Zone 10 | Tier 1 |
| The Beginning | Complete Zone 20 | Tier 1 |
| Determined | Complete Zone 30 | Tier 2 |
| Professor | Complete Zone 40 | Tier 2 |
| Trimp Aficionado | Complete Zone 50 | Tier 2 |
| Slayer of Planets | Complete Zone 60 | Tier 2 |
| Motivated | Complete Zone 70 | Tier 3 |
| Electric | Complete Zone 80 | Tier 3 |
| Stronk | Complete Zone 90 | Tier 3 |
| Endurance | Complete Zone 100 | Tier 3 |
| Unwavering | Complete Zone 110 | Tier 4 |
| Coordinated | Complete Zone 120 | Tier 4 |
| Resolved | Complete Zone 130 | Tier 4 |
| Steadfast | Complete Zone 140 | Tier 4 |
| Grit | Complete Zone 150 | Tier 5 |
| Perseverance | Complete Zone 160 | Tier 5 |
| Persistence | Complete Zone 170 | Tier 5 |
| Tenacity | Complete Zone 180 | Tier 5 |
| The Instigator | Complete Zone 190 | Tier 6 |
| The Destroyer | Complete Zone 200 | Tier 6 |
| The Eradicator | Complete Zone 210 | Tier 6 |
| The Exterminator | Complete Zone 220 | Tier 6 |
| Heat Maker | Complete Zone 230 | Tier 6 |
| Heat Hater | Complete Zone 240 | Tier 7 |
| Heat Breaker | Complete Zone 250 | Tier 7 |
| Heat Slayer | Complete Zone 260 | Tier 7 |
| Heat Expert | Complete Zone 270 | Tier 7 |
| Heat Bender | Complete Zone 280 | Tier 7 |
| Volcanic | Complete Zone 290 | Tier 7 |
| Magma Master | Complete Zone 300 | Tier 7 |
| Zone Shredder | Complete Zone 325 | Tier 8 |
| Acre of Nature | Complete Zone 350 | Tier 8 |
| Natural Clearer | Complete Zone 375 | Tier 8 |
| Aspirer | Complete Zone 400 | Tier 8 |
| Insane | Complete Zone 450 | Tier 8 |
| Spire Master | Complete Zone 500 | Tier 8 |
| Globalist | Complete Zone 525 | Tier 8 |
| World Leader | Complete Zone 550 | Tier 8 |
| Experienced | Complete Zone 600 | Tier 9 |
| Trimptrotter | Complete Zone 650 | Tier 9 |
| Echo Eradicator | Complete Zone 700 | Tier 9 |
| Obsidian Obliterator | Complete Zone 750 | Tier 10 |
| Master of Universes | Complete Zone 800 | Tier 11 |
| The Chosen One | Complete Zone 809 | Tier 12 |
Trimp Damage[]
| Achievement | Requirement | Tier |
|---|---|---|
| Lead Trimps | Reach 100 displayed damage | Tier 1 |
| Silver Trimps | Reach 100K displayed damage | Tier 1 |
| Golden Trimps | Reach 100B (1e11) displayed damage | Tier 2 |
| Copper Trimps | Reach 100Qa (1e17) displayed damage | Tier 2 |
| Platinum Trimps | Reach 100Sx (1e23) displayed damage | Tier 3 |
| Iron Trimps | Reach 100Oc (1e29) displayed damage | Tier 3 |
| Steel Trimps | Reach 100Dc (1e35) displayed damage | Tier 4 |
| Obsidian Trimps | Reach 100Dd (1e41) displayed damage | Tier 4 |
| Cobalt Trimps | Reach 100Qad (1e47) displayed damage | Tier 5 |
| Topaz Trimps | Reach 100Sxd (1e53) displayed damage | Tier 5 |
| Diamond Trimps | Reach 1Nd (1e60) displayed damage | Tier 6 |
| Transcendental Trimps | Reach 10Uv (1e67) displayed damage | Tier 6 |
Trimps Owned[]
| Achievement | Requirement | Tier |
|---|---|---|
| Too Many Trimps | Have 50 total Trimps | Tier 1 |
| Overcrowding | Have 150 total Trimps | Tier 1 |
| This Is Trimp | Have 300 total Trimps | Tier 1 |
| It Takes a Tribe | Have 1000 total Trimps | Tier 2 |
| It Takes a Town | Have 10K total Trimps | Tier 2 |
| It Takes a City | Have 100K total Trimps | Tier 2 |
| A Milli Trimpi | Have 1M total Trimps | Tier 3 |
| Trimpsponential Growth | Have 10M total Trimps | Tier 3 |
| MMMEGATRIMPS | Have 100M total Trimps | Tier 3 |
| It Takes a Nation | Have 1B total Trimps | Tier 4 |
| It Takes a Planet | Have 10B total Trimps | Tier 4 |
| It Takes a Universe | Have 100B total Trimps | Tier 4 |
Real Estate[]
| Achievement | Requirement | Tier |
|---|---|---|
| Tiny Homes | Build your first Hut | Tier 1 |
| Residential Development | Build your first House | Tier 1 |
| Taste for Luxury | Build your first Mansion | Tier 1 |
| Fancy | Build your first Hotel | Tier 1 |
| The Skyline | Build your first Resort | Tier 2 |
| Dimensional Drift | Build your first Gateway | Tier 2 |
| Too Cool For Helium | Build your first Wormhole | Tier 2 |
| Space From Stars | Build your first Collector | Tier 2 |
| To Infinity and Beyond | Build your first Warpstation | Tier 3 |
| Mass Generation | Use the Dimensional Generator | Tier 5 |
Total Portals[]
| Achievement | Requirement | Tier |
|---|---|---|
| A Trimp Through Time | Use the Portal 1 time | Tier 1 |
| When The Wild Things Are | Use the Portal 3 times | Tier 2 |
| A Time Like No Other | Use the Portal 10 times | Tier 2 |
| Venti Timeachino | Use the Portal 20 times | Tier 2 |
| Time Of Your Life | Use the Portal 50 times | Tier 3 |
| Centennial Trimper | Use the Portal 100 times | Tier 3 |
| Amnesia | Use the Portal 200 times | Tier 4 |
| Dedicated Traveller | Use the Portal 500 times | Tier 4 |
Total Zone Clears[]
| Achievement | Requirement | Tier |
|---|---|---|
| Pathfinder | Clear 30 total Zones | Tier 2 |
| Bushwhacker | Clear 70 total Zones | Tier 2 |
| Pioneer | Clear 130 total Zones | Tier 3 |
| Seeker | Clear 200 total Zones | Tier 3 |
| Adventurer | Clear 400 total Zones | Tier 3 |
| Lucky Resolve | Clear 777 total Zones | Tier 4 |
| GigaClearer | Clear 1000 total Zones | Tier 4 |
| Globetrotter | Clear 1500 total Zones | Tier 5 |
| Vanquisher | Clear 10K total Zones | Tier 7 |
| Conquistador | Clear 50K total Zones | Tier 7 |
Total Map Clears[]
| Achievement | Requirement | Tier |
|---|---|---|
| Map Maker | Clear 50 total Maps | Tier 1 |
| Map Runner | Clear 100 total Maps | Tier 2 |
| Map Destroyer | Clear 2000 total Maps | Tier 2 |
| Map Annihilator | Clear 5000 total Maps | Tier 3 |
| Map Slaughterer | Clear 10K total Maps | Tier 3 |
| Map Commander | Clear 20K total Maps | Tier 4 |
| Maptain | Clear 50K total Maps | Tier 4 |
| Cartographer | Clear 100K total Maps | Tier 5 |
Helium Collection[]
| Achievement | Requirement | Tier |
|---|---|---|
| Cool | Gather 100 total Helium | Tier 1 |
| Crisp | Gather 1000 total Helium | Tier 2 |
| Brisk | Gather 10K total Helium | Tier 3 |
| Chilly | Gather 100K total Helium | Tier 4 |
| Frosty | Gather 1M total Helium | Tier 5 |
| Frigid | Gather 10M total Helium | Tier 6 |
| Frozen | Gather 100M total Helium | Tier 6 |
| Gelid | Gather 1B total Helium | Tier 7 |
| Glacial | Gather 100B total Helium | Tier 7 |
| Freaking Cold | Gather 1T total Helium | Tier 7 |
| Arctic | Gather 100T total Helium | Tier 8 |
| Absolute Zero | Gather 10Qa total Helium | Tier 8 |
Helium Per Hour[]
| Achievement | Requirement | Tier |
|---|---|---|
| Coldlector | Reach 10 Helium Per Hour | Tier 2 |
| Centelium | Reach 100 Helium Per Hour | Tier 3 |
| Frosty Tanker | Reach 1000 Helium Per Hour | Tier 3 |
| Blimp Snatcher | Reach 10K Helium Per Hour | Tier 4 |
| Squeaky Dasher | Reach 100K Helium Per Hour | Tier 4 |
| Quick N Cool | Reach 1M Helium Per Hour | Tier 5 |
| Hour Bender | Reach 10M Helium Per Hour | Tier 6 |
| Acquired Frost | Reach 1B Helium Per Hour | Tier 7 |
| Vacuum | Reach 100B Helium Per Hour | Tier 7 |
| Levitator | Reach 10T Helium Per Hour | Tier 8 |
| Soarer | Reach 1Qa Helium Per Hour | Tier 8 |
| Cool Runnings | Reach 500Qa Helium Per Hour | Tier 9 |
Heirloom Collection[]
| Achievement | Requirement | Tier |
|---|---|---|
| Finder | Collect 1 Heirloom | Tier 2 |
| Gatherer | Collect 10 Heirlooms | Tier 2 |
| Accumulator | Collect 40 Heirlooms | Tier 3 |
| Fancier | Collect 100 Heirlooms | Tier 3 |
| Aficionado | Collect 500 Heirlooms | Tier 4 |
| Devotee | Collect 1111 Heirlooms | Tier 5 |
| Connoisseur | Collect 2000 Heirlooms | Tier 6 |
| Expert | Collect 5000 Heirlooms | Tier 7 |
| Curator | Collect 10K Heirlooms | Tier 8 |
Gem Collection[]
| Achievement | Requirement | Tier |
|---|---|---|
| What's This For? | Collect 1 Gem | Tier 1 |
| Collector of Shinies | Collect 1B (1e9) Gems | Tier 2 |
| Dragimp Lover | Collect 1Sx (1e21) Gems | Tier 3 |
| Expert of Shinies | Collect 1No (1e30) Gems | Tier 4 |
| Jeweller | Collect 1Dd (1e39) Gems | Tier 5 |
| Gemaster | Collect 1Qid (1e48) Gems | Tier 6 |
| Gemazing | Collect 1Od (1e57) Gems | Tier 7 |
Daily Bonus[]
| Achievement | Requirement | Tier |
|---|---|---|
| Daytermined | Earn 500K Helium from the Daily Challenge | Tier 3 |
| Daydicated | Earn 1M Helium from the Daily Challenge | Tier 4 |
| Daystiny | Earn 5M Helium from the Daily Challenge | Tier 5 |
| Daylighted | Earn 25M Helium from the Daily Challenge | Tier 6 |
| Daystroyer | Earn 2B Helium from the Daily Challenge | Tier 7 |
| Daylusional | Earn 1T Helium from the Daily Challenge | Tier 8 |
| Dayrailed | Earn 1Qa Helium from the Daily Challenge | Tier 8 |
| Daypocalyptic | Earn 1Sx Helium from the Daily Challenge | Tier 9 |
Humane Run[]
By mousing over the achievements in this category, you will see the messages "Still Earnable!", "You have lost once this zone, be careful!" or "You lost more than once on zone XXX". Note that you will fail these achievements if you lose two fights in a single zone. Note that "abandoning soldiers" and losses in maps both count as "losing a fight" for these achievements.
| Achievement | Requirement | Tier |
|---|---|---|
| Sitter | Reach Z5 after losing no more than one fight per zone | Tier 1 |
| Watchdog | Reach Z50 after losing no more than one fight per zone | Tier 4 |
| Nanny | Reach Z100 after losing no more than one fight per zone | Tier 5 |
| Caretaker | Reach Z150 after losing no more than one fight per zone | Tier 6 |
| Supervisor | Reach Z200 after losing no more than one fight per zone | Tier 7 |
| Advocate | Reach Z250 after losing no more than one fight per zone | Tier 7 |
| Guardian | Reach Z300 after losing no more than one fight per zone | Tier 7 |
| Coddler | Reach Z350 after losing no more than one fight per zone | Tier 7 |
| Savior | Reach Z400 after losing no more than one fight per zone | Tier 8 |
| Defender | Reach Z450 after losing no more than one fight per zone | Tier 8 |
| Trimp Lover | Reach Z500 after losing no more than one fight per zone | Tier 8 |
| Righteous | Reach Z600 after losing no more than one fight per zone | Tier 9 |
Speed: The Block[]
| Achievement | Requirement | Tier |
|---|---|---|
| Block Hobbyist | Clear The Block in less than 8 hours from start of run | Tier 1 |
| Block Apprentice | Clear The Block in less than 4 hours from start of run | Tier 1 |
| Block Professional | Clear The Block in less than 2 hours from start of run | Tier 2 |
| Block Rockstar | Clear The Block in less than 1 hour from start of run | Tier 2 |
Speed: The Wall[]
| Achievement | Requirement | Tier |
|---|---|---|
| Wall Novice | Clear The Wall in less than 8 hours from start of run | Tier 2 |
| Wall Student | Clear The Wall in less than 4 hours from start of run | Tier 2 |
| Wall Contender | Clear The Wall in less than 2 hours from start of run | Tier 2 |
| Wall Scaler | Clear The Wall in less than 1 hour from start of run | Tier 3 |
Speed: Anger[]
| Achievement | Requirement | Tier |
|---|---|---|
| Angry Jogger | Clear DoA in less than 8 hours from start of run | Tier 2 |
| Angry Runner | Clear DoA in less than 4 hours from start of run | Tier 2 |
| Angry Sprinter | Clear DoA in less than 2 hours from start of run | Tier 3 |
| Angry Racer | Clear DoA in less than 1 hour from start of run | Tier 3 |
| Angry Teleporter | Clear DoA in less than 1 min from start of run | Tier 8 |
Speed: Doom[]
| Achievement | Requirement | Tier |
|---|---|---|
| Walk to Doom | Clear ToD in less than 8 hours from start of run | Tier 2 |
| Trot to Doom | Clear ToD in less than 4 hours from start of run | Tier 3 |
| Canter to Doom | Clear ToD in less than 2 hours from start of run | Tier 3 |
| Gallop to Doom | Clear ToD in less than 1 hour from start of run | Tier 4 |
Speed: The Prison[]
| Achievement | Requirement | Tier |
|---|---|---|
| Prison Odyssey | Clear The Prison in less than 8 hours from start of run | Tier 3 |
| Prison Expedition | Clear The Prison in less than 6 hours from start of run | Tier 4 |
| Prison Adventure | Clear The Prison in less than 4 hours from start of run | Tier 4 |
| Prison Trek | Clear The Prison in less than 3 hours from start of run | Tier 5 |
| Prison Tour | Clear The Prison in less than 2:30 from start of run | Tier 5 |
| Prison Road Trip | Clear The Prison in less than 2 hours from start of run | Tier 5 |
| Prison Hike | Clear The Prison in less than 1:45 from start of run | Tier 6 |
| Prison Jog | Clear The Prison in less than 1:30 from start of run | Tier 6 |
| Prison Sprint | Clear The Prison in less than 10 mins from start of run | Tier 8 |
Speed: Bionic[]
| Achievement | Requirement | Tier |
|---|---|---|
| Lover of Bots | Clear Bionic Wonderland in less than 24 hours from start of run | Tier 4 |
| Friend of Bots | Clear Bionic Wonderland in less than 20 hours from start of run | Tier 4 |
| Acquaintance of Bots | Clear Bionic Wonderland in less than 12 hours from start of run | Tier 5 |
| Bot Disliker | Clear Bionic Wonderland in less than 8 hours from start of run | Tier 5 |
| Bot Hater | Clear Bionic Wonderland in less than 3:30 from start of run | Tier 6 |
| Bot Slayer | Clear Bionic Wonderland in less than 2:30 from start of run | Tier 6 |
Speed: Star[]
| Achievement | Requirement | Tier |
|---|---|---|
| Cosmic Curiosity | Clear Imploding Star in less than 28 hours from start of run | Tier 5 |
| Star Struck | Clear Imploding Star in less than 18 hours from start of run | Tier 5 |
| Space Speeder | Clear Imploding Star in less than 6:30 from start of run | Tier 5 |
| Intense Inertia | Clear Imploding Star in less than 3 hours from start of run | Tier 6 |
| Stellar Striker | Clear Imploding Star in less than 2:30 from start of run | Tier 6 |
| Insane Imploder | Clear Imploding Star in less than 50 mins from start of run | Tier 7 |
| Born Imploded | Clear Imploding Star in less than 5 mins from start of run | Tier 8 |
Speed: Spire[]
| Achievement | Requirement | Tier |
|---|---|---|
| Spire Trialer | Clear The Spire in less than 21:40 from start of run | Tier 6 |
| Spire Rider | Clear The Spire in less than 15 hours from start of run | Tier 6 |
| Spire Strider | Clear The Spire in less than 8:20 from start of run | Tier 6 |
| Spire Glider | Clear The Spire in less than 3:20 from start of run | Tier 7 |
| Spire Flier | Clear The Spire in less than 2:55 from start of run | Tier 7 |
| Inspired | Clear The Spire in less than 1 hour from start of run | Tier 7 |
| Spire Spirer | Clear The Spire in less than 2 mins from start of run | Tier 8 |
Speed: Spire II[]
| Achievement | Requirement | Tier |
|---|---|---|
| Toxic Treader | Clear Spire II in less than 8:20 from start of run | Tier 6 |
| Toxic Trotter | Clear Spire II in less than 3:20 from start of run | Tier 7 |
| Toxic Traveller | Clear Spire II in less than 2 hours from start of run | Tier 8 |
| Toxic Tempo | Clear Spire II in less than 1 hour from start of run | Tier 8 |
| Toxic Teleporter | Clear Spire II in less than 10 mins from start of run | Tier 9 |
Speed: Spire III[]
| Achievement | Requirement | Tier |
|---|---|---|
| Chillin | Clear Spire III in less than 8 hours from start of run | Tier 6 |
| Arctic Accelerator | Clear Spire III in less than 4 hours from start of run | Tier 7 |
| Rimy Runner | Clear Spire III in less than 2 hours from start of run | Tier 8 |
| Subzero Sprinter | Clear Spire III in less than 1:20 from start of run | Tier 8 |
| Frigid and Furious | Clear Spire III in less than 20 mins from start of run | Tier 9 |
Speed: Spire IV[]
| Achievement | Requirement | Tier |
|---|---|---|
| Windy Walker | Clear Spire IV in less than 72 hours from start of run | Tier 8 |
| Gusty Gait | Clear Spire IV in less than 48 hours from start of run | Tier 8 |
| Breeze Breaker | Clear Spire IV in less than 24 hours from start of run | Tier 8 |
| Zippy Zephyr | Clear Spire IV in less than 5 hours from start of run | Tier 8 |
| Temporal Tempest | Clear Spire IV in less than 1 hour from start of run | Tier 9 |
| Stratus Screamer | Clear Spire IV in less than 30 mins from start of run | Tier 9 |
| Tearin' Tornado | Clear Spire IV in less than 11 mins from start of run | Tier 10 |
Speed: Spire V[]
| Achievement | Requirement | Tier |
|---|---|---|
| actiVe | Clear Spire V in less than 24 hours from start of run | Tier 8 |
| resolVed | Clear Spire V in less than 6 hours from start of run | Tier 9 |
| traVeler | Clear Spire V in less than 2 hours from start of run | Tier 9 |
| driVen | Clear Spire V in less than 40 mins from start of run | Tier 10 |
| triVialized | Clear Spire V in less than 20 mins from start of run | Tier 10 |
Speed: Spire VI[]
| Achievement | Requirement | Tier |
|---|---|---|
| naVIgator | Clear Spire VI in less than 24 hours from start of run | Tier 10 |
| diVIne | Clear Spire VI in less than 8 hours from start of run | Tier 11 |
| thriVIng | Clear Spire VI in less than 2 hours from start of run | Tier 12 |
| leVItator | Clear Spire VI in less than 45 mins from start of run | Tier 12 |
| relatiVIstic | Clear Spire VI in less than 25 mins from start of run | Tier 12 |
Speed: Spire VII[]
| Achievement | Requirement | Tier |
|---|---|---|
| World Wall | Clear Spire VII in less than 64 hours from start of run | Tier 12 |
| Reality Rider | Clear Spire VII in less than 8 hours from start of run | Tier 12 |
| Destructive Destiny | Clear Spire VII in less than 2 hours from start of run | Tier 13 |
| Cosmic Collapser | Clear Spire VII in less than 42 mins from start of run | Tier 13 |
U2 Achievements[]
The achievement categories specific to Universe 2 are interwoven with the Universe 1 achievements when they are unlocked in a way that generally makes sense. They're separated here for ease of reference.
Zone Progress: U2[]
Appears beneath Zone Progress.
| Achievement | Requirement | Tier |
|---|---|---|
| This is Harder | Complete Zone 2 in Universe 2 | Tier 9 |
| Second Coming | Complete Zone 5 in Universe 2 | Tier 9 |
| Blimp Destroyer | Complete Zone 10 in Universe 2 | Tier 10 |
| Improbable Again | Complete Zone 20 in Universe 2 | Tier 10 |
| Unstoppable | Complete Zone 30 in Universe 2 | Tier 10 |
| Progresser | Complete Zone 40 in Universe 2 | Tier 10 |
| Fifty Fifty | Complete Zone 50 in Universe 2 | Tier 10 |
| Actually Unbroken | Complete Zone 60 in Universe 2 | Tier 11 |
| Lucky 7D | Complete Zone 70 in Universe 2 | Tier 11 |
| Apt | Complete Zone 80 in Universe 2 | Tier 11 |
| The Unshocked | Complete Zone 90 in Universe 2 | Tier 11 |
| Universalist | Complete Zone 100 in Universe 2 | Tier 11 |
| Through The Unknown | Complete Zone 110 in Universe 2 | Tier 12 |
| Swarming | Complete Zone 120 in Universe 2 | Tier 12 |
| Steamroller | Complete Zone 130 in Universe 2 | Tier 12 |
| Universal Destroyer | Complete Zone 140 in Universe 2 | Tier 12 |
| Eater of Zones | Complete Zone 150 in Universe 2 | Tier 12 |
| Bringer of Progress | Complete Zone 160 in Universe 2 | Tier 13 |
| Major Zonage | Complete Zone 170 in Universe 2 | Tier 13 |
| Master of Alchemy | Complete Zone 180 in Universe 2 | Tier 13 |
| Ballistic | Complete Zone 190 in Universe 2 | Tier 13 |
| Neverending Journey | Complete Zone 200 in Universe 2 | Tier 13 |
Radon Collection[]
Appears beneath Helium Collection.
| Achievement | Requirement | Tier |
|---|---|---|
| Radon Runner | Gather 100 total Radon | Tier 9 |
| The Irradiated | Gather 10K total Radon | Tier 9 |
| Radonlicious | Gather 500K total Radon | Tier 10 |
| Radon Quixote | Gather 10M total Radon | Tier 10 |
| Radon Racer | Gather 1B total Radon | Tier 10 |
| Raging Radon | Gather 100B total Radon | Tier 11 |
| Radon Wrangler | Gather 10T total Radon | Tier 12 |
| All Said and Radone | Gather 10Qa total Radon | Tier 12 |
| Radominating | Gather 10Qi total Radon | Tier 13 |
| Rads to Riches | Gather 1Sx total Radon | Tier 13 |
| Radonculous | Gather 1Sp total Radon | Tier 13 |
Mapless Drifter[]
Appears beneath Humane Run.
| Achievement | Requirement | Tier |
|---|---|---|
| Map Misser | Reach U2 Z20 without ever entering a Map. | Tier 10 |
| Map Lacker | Reach U2 Z30 without ever entering a Map. | Tier 10 |
| Mapophobia | Reach U2 Z40 without ever entering a Map. | Tier 11 |
| GPS | Reach U2 Z50 without ever entering a Map. | Tier 11 |
| Undisoriented | Reach U2 Z60 without ever entering a Map. | Tier 11 |
| Need No Map | Reach U2 Z70 without ever entering a Map. | Tier 11 |
| The Efficient | Reach U2 Z80 without ever entering a Map. | Tier 11 |
| Bulldozer | Reach U2 Z90 without ever entering a Map. | Tier 12 |
| Worldly | Reach U2 Z100 without ever entering a Map. | Tier 12 |
| Big Pusher | Reach U2 Z125 without ever entering a Map. | Tier 13 |
| Defragmented | Reach U2 Z150 without ever entering a Map. | Tier 13 |
| Stubborn | Reach U2 Z175 without ever entering a Map. | Tier 13 |
Shielded[]
Appears beneath Mapless Drifter.
| Achievement | Requirement | Tier |
|---|---|---|
| Crumb of Comfort | Reach U2 Z40 without your Shield falling below 25%. | Tier 11 |
| Common Comfort | Reach U2 Z50 without your Shield falling below 35%. | Tier 11 |
| Controlled Comfort | Reach U2 Z60 without your Shield falling below 45%. | Tier 11 |
| Certain Comfort | Reach U2 Z70 without your Shield falling below 50%. | Tier 11 |
| Copious Comfort | Reach U2 Z80 without your Shield falling below 50%. | Tier 12 |
| Critical Comfort | Reach U2 Z90 without your Shield falling below 50%. | Tier 12 |
| Cosmic Comfort | Reach U2 Z100 without your Shield falling below 60%. | Tier 12 |
| Colossal Comfort | Reach U2 Z125 without your Shield falling below 60%. | Tier 13 |
| Ceaseless Comfort | Reach U2 Z150 without your Shield falling below 70%. | Tier 13 |
| Complete Comfort | Reach U2 Z175 without your Shield falling below 70%. | Tier 13 |
U2 Speed: Big Wall[]
Appears beneath Speed: Spire V. The other U2 speed achievements will appear below this.
| Achievement | Requirement | Tier |
|---|---|---|
| Big Wall Crawler | Clear Big Wall in less than 1:40 from start of run | Tier 9 |
| Big Wall Scholar | Clear Big Wall in less than 50 mins from start of run | Tier 9 |
| Big Wall Mauler | Clear Big Wall in less than 10 mins from start of run | Tier 10 |
| Big Wall Baller | Clear Big Wall in less than 4 mins from start of run | Tier 11 |
U2 Speed: Palace[]
| Achievement | Requirement | Tier |
|---|---|---|
| Peasant | Clear Prismatic Palace in less than 3 hours from start of run | Tier 10 |
| Jester | Clear Prismatic Palace in less than 1:30 from start of run | Tier 10 |
| Advisor | Clear Prismatic Palace in less than 40 mins from start of run | Tier 11 |
| Ruler | Clear Prismatic Palace in less than 12 mins from start of run | Tier 12 |
U2 Speed: Atlantrimp[]
| Achievement | Requirement | Tier |
|---|---|---|
| Sinker | Clear Atlantrimp in less than 4 hours from the start of run | Tier 10 |
| Floater | Clear Atlantrimp in less than 1 hour from the start of run | Tier 11 |
| Swimmer | Clear Atlantrimp in less than 20 minutes from the start of run | Tier 12 |
U2 Speed: Melting[]
| Achievement | Requirement | Tier |
|---|---|---|
| Thawed | Clear Melting Point in less than 6 hours from start of run | Tier 11 |
| Tempered | Clear Melting Point in less than 1:40 from start of run | Tier 12 |
| Melty | Clear Melting Point in less than 45 mins from start of run | Tier 12 |
| Molten | Clear Melting Point in less than 30 mins from start of run | Tier 12 |
Feats[]
Here's a list of all the feats that are visible in the achievement screen by default. Their names and conditions will become visible once one has reached a certain zone, usually the one related to their unlocking criteria. For example, Thick Skinned will be available once you reach zone 125, where Crushed is unlocked. It is possible to earn certain feats before their conditions become visible.
Some feats are earned by completing a specific Challenge under certain restrictions. Other feats can be completed in Challenge²s, like Grounded and Great Host.
Some feats are hidden until they are earned, and then they will be listed with the visible feats in-game. These are covered in the section below to avoid spoilers. For a table on hidden feats (which are listed in the same category once unlocked) look at the next section.
| Achievement | Requirement | Zone | Tier |
|---|---|---|---|
| Forgot Something | Complete the Dimension of Anger before buying Bounty | 20 | Tier 2 |
| Underachiever | Reach Z30 with no respec and 60 or less He spent | 30 | Tier 3 |
| Hoarder | Have over 1M Traps at once | 30 | Tier 3 |
| Underbalanced | Beat Balance, never having more than 100 stacks | 40 | Tier 3 |
| Peacekeeper | Reach Zone 10 with 5 or fewer dead Trimps | 60 | Tier 4 |
| Grounded | Attack 20 times without dying in Electricity | 80 | Tier 4 |
| Now What | Use up all 7 Daily Challenges | 100 | Tier 5 |
| Swag | Equip a magnificent or better Staff and Shield | 125 | Tier 5 |
| Workplace Safety | Reach Z60 with 1000 or fewer dead Trimps | 60 | Tier 5 |
| No Time for That | Reach Z120 without using manual research (i.e. the player must never be assigned to science/research during the run) | 120 | Tier 5 |
| Tent City | Reach Z75 without buying any housing | 75 | Tier 5 |
| Holey | Spend over 250k total He on Wormholes | 75 | Tier 5 |
| Shaggy | Reach Z60 with rank III or lower equipment | 60 | Tier 5 |
| One-Hit Wonder | Kill an Improbability in one hit | 60 | Tier 5 |
| Survivor | Beat a Lv 60+ Destructive Void Map with no deaths | 60 | Tier 5 |
| Thick Skinned | Beat Crushed without being crit past Z5 | 125 | Tier 5 |
| Great Host | Kill an enemy with 100 stacks of Nom | 145 | Tier 5 |
| Unbroken | Break the Planet with 5 or fewer lost battles | 60 | Tier 5 |
| Unemployment | Reach Z60 without hiring a single Trimp | 60 | Tier 6 |
| Very Sneaky | Complete a zone above 99 without falling below 150 stacks on Life | 110 | Tier 6 |
| Trimp is Poison | Beat Toxicity, never having more than 400 stacks | 165 | Tier 6 |
| Realtor | Own 100 of all housing buildings | 60 | Tier 6 |
| Grindless | Complete Watch without entering any maps or purchasing Nurseries | 180 | Tier 6 |
| Leadership | Complete Lead with 100 or fewer lost battles | 180 | Tier 6 |
| Defender | Build your 10th Spire Floor | 200 | Tier 7 |
| Stoned | Kill 500K enemies in your Spire | 200 | Tier 7 |
| Swagmatic | Equip a magmatic Staff and Shield | 230 | Tier 7 |
| Brr | Bring a world enemy's attack below 1 | 246 | Tier 7 |
| Unsatisfied Customer | Complete Lead with 1 or fewer Gigastations | 180 | Tier 7 |
| Organic Trimps | Complete Corrupted without Geneticists | 190 | Tier 7 |
| Fhtagn | Complete a Void Map at Z215 on Domination | 215 | Tier 7 |
| Invincible | Complete The Spire with 0 deaths | 200 | Tier 7 |
| Mighty | Overkill an Omnipotrimp | 230 | Tier 7 |
| Mother Lode | Defeat a Healthy enemy with 200 stacks of Wind | 300 | Tier 7 |
| Infected | Build up a Poison debuff that's 1000x higher than your attack | 300 | Tier 7 |
| Challenged | Earn a Challenge² bonus of 2000% | 66 | Tier 8 |
| Bionic Sniper | Complete a Bionic Wonderland map 45 levels higher than your zone number | 170 | Tier 8 |
| Nerfed | Beat the Spire with no respec and less than 100M He spent | 200 | Tier 8 |
| Obliterate | Defeat an enemy on Obliterated | 425 | Tier 8 |
| M'Algamator | Find an Amalgamator on Z1 | 350 | Tier 8 |
| AntiScience | Beat Z75 on the Scientist V challenge | 130 | Tier 8 |
| HeMergency | Gain at least 01189998819991197253 He (Approximately 1.19Qi He or 1.19e18) from one Bone Portal | 400 | Tier 8 |
| Eradicate | Kill an Enemy on Eradicated | 550 | Tier 8 |
| Invisible | Complete Spire V with no deaths | 600 | Tier 8 |
| Power Tower | Build your 20th Spire Floor | 200 | Tier 8 |
| Bionic Nuker | Complete a Bionic Wonderland map 200 levels higher than your Zone number | 325 | Tier 9 |
| Hypercoordinated | Complete Spire II on the Coordinate challenge | 300 | Tier 9 |
| Nerfeder | Beat Spire II with no respec and 1B or less Helium spent | 300 | Tier 9 |
| Imploderated | Beat Imploding Star on Obliterated | 425 | Tier 9 |
| Wildfire | Close 750 Nurseries at the same time | 230 | Tier 9 |
| Unessenceted | Earn Dark Essence with no respec and 0 He spent | 180 | Tier 9 |
| Melted | Reach Magma on Obliterated | 425 | Tier 9 |
| Screwed | Break the Planet on Eradicated | 550 | Tier 9 |
Hidden Feats[]
These feats are hidden in-game. Expand the table if you want to see them.
| Achievement | Requirement | Tier |
|---|---|---|
| Needs Block | Die 50 times to a single Voidsnimp | Tier 3 |
| Elite Feat | Reach exactly 1337 He/hr | Tier 4 |
| Maptastic | Create a perfect map | Tier 4 |
| Consolation Prize | Find a Common heirloom at Z146 or higher | Tier 5 |
| Gotta Go Fast | Overkill every possible world cell before Z60 | Tier 6 |
| Extra Crispy | Spend at least 10 minutes breeding an army with Geneticists | Tier 6 |
| Critical Luck | Get 10 Red Crits in a row | Tier 8 |
U2 Feats[]
The feats specific to Universe 2 are listed in a separate category (still named "Feats") that is hidden until Universe 2 is unlocked.
| Achievement | Requirement | Zone | Tier |
|---|---|---|---|
| Don't Need Luck | One-shot a Dimension of Rage enemy on Unlucky while Unlucky | 15 | Tier 10 |
| Perfectly Balanced | Complete Downsize with an equal amount of Huts, Houses, Mansions, Hotels and Resorts | 20 | Tier 10 |
| Resourceyphobe | Complete Transmute without hiring a single Trimp | 25 | Tier 11 |
| Upsized | Complete Unbalance with 500 stacks of Unbalance | 35 | Tier 11 |
| Unpoppable | Complete Bublé without using Prismal or respeccing Perks | 40 | Tier 11 |
| Pwnd | Complete Duel without ever falling below 20 points | 45 | Tier 11 |
| Solid | Complete Melt without ever having more than 150 stacks | 50 | Tier 11 |
| Coastapalooza | Complete Trappapalooza without Trapping on or above Z50 | 60 | Tier 12 |
| Witherproof | Complete Wither with 10K stacks of Hardened | 70 | Tier 12 |
| Huffstle | Reach a session score of 100-0 at L5+ in SA | 75 | Tier 12 |
| Just Smack It | Kill a L20+ SA Enemy without Shock, Bleed or Poison | 75 | Tier 12 |
| Close Call | Complete Revenge with exactly 19 stacks | 80 | Tier 12 |
| Level Up | Complete 80/80 quests on Quest | 85 | Tier 12 |
| Unassisted | Complete Archaeology without ever having more than 0 of one relic | 95 | Tier 12 |
| Clear Skies | Complete Storm without ever encountering a Stormcloud | 105 | Tier 13 |
| Actually Insane | Complete Insanity with 500 stacks without running a map above 50 lvl | 110 | Tier 13 |
| You're Doing It Wrong | Finish Berserk after reaching 20 Weakened Stacks before Z100 | 115 | Tier 13 |
| The Tortoise and the Bugs | Reach 100 Swarm stacks by Z120 then complete Exterminate | 120 | Tier 13 |
| Nurtured AF | Reach L19 Cruffys by Z70 then complete Nurture | 135 | Tier 13 |
| Heavy Trinker | Collect 7500 Runetrinkets | 135 | Tier 13 |
| Peace | Complete all 25 Mayhems | 100 | Tier 13 |
| Mad Scientist | Complete a Z155 Void Map with 10 Gas Brews and 0 Void Pots | 155 | Tier 13 |
Hidden U2 Feats[]
These feats are hidden in-game. Expand the table if you want to see them.
| Achievement | Requirement | Tier |
|---|---|---|
| Eliter Feat | Reach exactly 1337 Rn/Hr | Tier 10 |
Feat Completion Guides[]
Generally, most achievements will become possible to complete once the player has acquired enough Helium/Radon, Heirlooms, Masteries, Liquification and other bonuses.
This section covers tips/tricks on completion of feats of strength. Click on Expand to see them.
Tiers 1-5[]
Underachiever[]
You must Respec into a build that uses 60 or less Helium before you Portal, and you cannot respec after you Portal. You should preferably respec in the Portal screen. It is suggested to either run Underachiever in the beginning of the game (around 1-2 Portals; NOT IDEAL) or in late game when you'll have permanent upgrades and powerful Heirlooms. As well, running this with the Decay challenge (to take advantage of the health/loot/gathering bonuses at the start of zones) can speed things up considerably.
Peacekeeper and Workplace Safety[]
Going to the Map Chamber will kill your Trimps. Leaving a map through the Maps button will also kill your Trimps. The only way that lets your Trimps survive is from a map, by using the Repeat Off function. If you leave a map with Repeat Off and Exit to Maps setting toggled, the game will allow you to start another map without killing your Trimps. If you leave a map with Repeat Off and Exit to World setting toggled, you will be allowed to continue with the same group of soldiers without them dying, but you can't go back to maps. For instance, the best way to beat The Wall, while being allowed to farm another map, would be to enter The Wall, complete it with Repeat Off and Exit to Maps, then once you beat it, go to another map, and once you're done farming complete it with Repeat Off and Exit to World. A Shield Heirloom with Trainer Efficiency, Trimp Block and Health might be quite useful.
Peacekeeper[]
Trimps can be kept alive by either running the Frugal challenge, or having Feyimp and the Scientist II challenge reward gear, and upgrading gear faster than the Trimps can die. Keeping enough attack to one-shot enemies will also minimize the damage taken. Keeping AutoFight off will allow management of resources between groups of Trimps. After the first Trimp dies, one level of Coordination should be purchased to keep the next two groups alive as long as possible. After those next two groups die, all remaining Coordinations should be purchased, allowing your Trimps to have well more than enough health and block to beat zone 9.
Block from Trainers and Gyms (including the trainer upgrade) doesn't update until a fighting group dies and a new group is sent in, so there's no immediate benefit to spending on those while a group is active; just make sure you buy what you can before you spawn the new fighting group.
Shieldblock isn't available until zone 11, so block shield has no bearing on this particular feat.
Workplace Safety[]
Get Scientist IV. Whenever you die, fight maps where your block is higher than the enemies' attack until you have all the upgrades available at your level. Once you reach level 45, max your Coordination, get all the available equipment, get your health/block high enough to beat 763Qa attack without dying and complete the achievement.
| Coordinations | Trimps Fighting[1] | Zone Level | Max Deaths | Dead Trimps |
|---|---|---|---|---|
| 6 | 9 | 15 | 1 | 9 |
| 10 | 24 | 25 | 2 | 57 |
| 13 | 48 | 35 | 4 | 249 |
| 15 | 75 | 45 | 10 | 999 |
- ↑ This number (and thus the total) will be reduced with the Coordinated perk.
This achievement is significantly harder than Peacekeeper. It can be done with about 25 million Helium (as of game version 5.7), but it's quite difficult at that point.
Grounded[]
There is some luck in getting this achievement, since you need to be able to one-hit slow enemies at least 15 times in a row (this ensures survival for 20 attacks). The easiest way to do this is to create a Mountains map with Fast Attacks on a low-level zone (lowest chance of fast enemies) and idle there until you have the achievement. An alternate strategy is much the same as the first, except you can start with low equipment levels and upgrade when your health gets low, thus increasing your health and maximum health every time and allowing you to survive more hits while debuffed.
No Time for That[]
You can't click the Research button at any point until you reach zone 120. Scientists must be used. Easy to do after completing Scientist IV.
Tent City[]
You're not allowed to buy any housing. This includes Warpstations, meaning you're also not allowed to buy any Gigastations as these come with a level 1 Warpstation by default. Tauntimp and high level of Trumps would be helpful.
Don't skimp on Carpentry (which stacks with Trumps/Tauntimps) and Coordinated either. This one's quite a bit harder than the zone-60 feats because of the zone-75 target.
Shaggy[]
The toughest Tier 5 feat by far; it is recommended to have at least unlocked Power II before attempting this achievement. Dump all your Helium in Power and Power II. No point in wasting Helium on Resilience; you will have enough Block, but low Trimp damage will be REALLY annoying. If you keep the Trimps bar under half, you can keep all of them working so they don't breed, and thus easily have max Anticipation stacks on each army you send out.
Thick Skinned[]
You probably want to circle back to this after you've graduated out of Crushed runs, but not by too much. Ideally you'll do this before you build up a bunch of Challenge² bonus. It's also helpful to have an Heirloom shield with Trainer+Block and without Health.
Respec out of Toughness and Resilience. Turn AutoPrestige to Weapons Only if you have it and turn off AutoFight. Focus on Gyms and Shield with Shieldblock, and don't buy any armor upgrades. After you break the planet, only buy enough armor (and add Helium to Toughness and Resilience) to raise your HP to around 1/2 of your block. If you can't do the math, only increase your HP by these methods when you're not actually fighting, and recheck your HP after each purchase, to make sure your health isn't too high. Use Barrier formation once it is available. Disable Geneticistassist if it is available.
Critical hits caused by Heinous Void Map enemies don't count against this achievement, so feel free to run voids normally.
Great Host[]
Disable your Map At Zone settings (if applicable). Let the game run until you get to 100 stacks of Nom (probably on an Improbability), and then upgrade your weapons and armor. This feat can be completed very quickly after you unlock Nom.
Respeccing out of Power/Relentlessness shouldn't be necessary unless you're seriously far past the unlock point for the Nom challenge.
Tiers 6-7[]
Unemployment[]
Not as hard as it sounds. Being conscripted into your army doesn't count as employment, so you can have as much population and army size (Coordinations) as you want. You'll have to research all the Science yourself. Other than that, the real limit will be resource gathering. Most of your resources will come from combat drops, especially in maps.
Very Sneaky[]
You will need to (ideally) reach zone 100 with maximum stacks, and avoid hitting any Living enemy for the entire zone you are aiming for this achievement on. To do this, you will need to know the virus movement like the back of your hand. Respec out of Overkill, Agility and for 20 Bones, Hyperspeed Masteries if you have slow reaction times. Turn AutoFight off and force-abandon to Maps as soon as you see the virus approaching the next few cells in your way. Be careful around the edges of the World, as the virus is able to 'phase' through the edges of the world. If you have Liquification up to Zone 110, then the easiest way is to turn Liquification off at zone 99 (a Living enemy is guaranteed to be on the first cell of zone 100), get maximum stacks on your Trimps at the end of zone 100, then turn Liquification back on.
Realtor[]
You need 100 (or more) of all housing. This includes Wormholes, which cost little under 185K Helium (less with Resourceful), and Warpstations (here it doesn't matter on which Gigastation you're on, as long as the number under Warpstation is 100 or higher). This is not recommended to attempt unless you consider 100-200K Helium to be an insignificant amount compared to the amount you earn, or if you really want the achievement despite the high Helium cost. This achievement can help you obtain one hidden achievement; expand the table of hidden feats above for details on it.
Brr[]
Can be done with surprisingly moderate Ice Empowerment and Transfer levels. Pushing beyond where you'd normally portal, and then unequipping your heirloom shield will often be enough; you can sell your Strength Towers as well (buy them right back after you're done); you can Respec to remove all damage-increasing perks before fighting an enemy to reduce damage even further. A "Healthy" enemy's HP makes this easier, so try to complete at least the first two Spires. If that's out of reach, you might be able to do it with a Corrupted Toughness enemy, or an Omnipotrimp.
Unintentional enemy death can be further counteracted via an active Nom Challenge² (this attack bonus is limited to 100 stacks, so Brr is still possible).
Note: Unlike Infected, this cannot be completed in a Bionic Wonderland map.
Infected[]
As with Brr, the simplest way to complete these feats is to have high Poison Empowerment level. Also as with Brr, making use of Nom Challenge² can prevent enemies from dying too quickly, and for Infected this can be augmented by intentionally fighting in a high-level Bionic Wonderland. This achievement is based on the current attack power. Once poison damage is high enough, you should change heirlooms and stances to drop your the attack power lower. This achievement can be earned more easily using a low-attack respec, but that should be unnecessary if you have about 10 Empowerments of Poison.
Tiers 8+[]
Bionic Sniper[]
The easiest way to complete this feat is to attempt BW275 from zone 230. Wait until you have enough population to immediately purchase at least 60 of the extra 100 Coordination upgrades when you enter Magma; you can use the Dimensional Generator to fuel at z230 if needed. Doing this feat during a Challenge² run where you've picked up Golden Battle upgrades is also recommended for the extra combat bonuses.
Nerfed[]
Get your Achievement and Challenge² bonuses as high as you can. A good Shield Heirloom with Trimp Health is also needed. Farm Extra Zone Maps for bonus prestiges, and run Toxicity² to farm metal for your equipments. Abandon the challenge once you are ready to attempt the Spire.
You won't have Fluffy or any of the Nature bonuses... But don't forget that you can build nurseries because you won't be getting into magma.
You may use the Perky setting labeled "Nerfed feat". Due to a bug in the game's rounding, you'll need to clear all perks before importing the Perky string.
Nerfeder[]
Do the run in Nom² (including Spire II). A high Fluffy evolution number helps, because you'll only have 1 point in Capable, but level 1 of a high evolution level still gives quite a bit of attack. High Dim Gen levels also help, because you won't be able to afford all of your Coordinations. High population gets you more of them.
Remember that you must not fail Spire 1, or Spire 2 won't be there. For both spires, raiding prestiges from a +5 zone map should be sufficient, assuming appropriately high Fluffy, Dim Gen, heirlooms, and challenge² bonus. When running this in Nom², one hit kills ensure that you don't get killed by the enemies regardless of your health, so when you reach Spire 2, you can turn off your Geneticistassist and remove all of your Geneticists and autofight the highest Bionic Wonderland you can, letting your poison build up to high enough to one hit kill every enemy and eventually Druopitee, being sure to turn off autofight before returning to the world, and returning to Bionic Wonderland whenever your poison stacks deplete.
You may use the Perky setting labeled "Nerfeder". Due to a bug in the game's rounding, you'll need to clear all perks before importing the Perky string.
Hypercoordinated[]
You can do it from the Coordinate² challenge.
Imploderated[]
Remember that the enemies get 10 times stronger every 10th zone. From zone 159, you can make a +6 zone map to get the zone 165 prestiges. Then run BW maps until BW170, pick up Imploding Star from BW170, abandon BW170, and run Imploding Star. Should only take a few hours with 3-5Sx HE, Fluffy E5 and ~5000% c² (boosted to ~10k with Mesmer), not worth spending days on it since you'll be back for Melted anyway.
Wildfire[]
See this guide.
Unessencented[]
See this guide.
Melted[]
See this guide.
Screwed[]
See this guide.
Hidden Feats[]
Some feats are hidden until they are earned, and then they will be listed with the visible feats in-game. Guides for some of these feats are covered in this section to avoid spoilers.
Expand to see content.
U1 Hidden Feats:
Needs Block (Tier 3: 2.5% bonus)[]
Early game method: For this method, it's recommended to not spend too much food on Trainers. Go through a Void Map until you find a Voidsnimp. Once you do, fire all your Trainers. You should have so little block that the Voidsnimp can kill your Trimps in one hit.
Mid to late game method: Hire some Geneticists. Then find a Voidsnimp that you won't kill in 1 hit. As soon as you find the Voidsnimp, fire all your Geneticists. The next trimp group will have much less health and will die quickly. Wait and die 50 times.
Elite Feat (Tier 4: 5% bonus)[]
The easiest way to do this achievement is to reach Helium/hr which is slightly higher than 1337, then let the game run without earning more Helium (running a map, for example). Your Helium/hr will gradually go down until it reaches this number. The game must be running (not paused) for this to work.
Maptastic (Tier 4: 5% bonus)[]
Create a map with all three modifiers at their best value (160% Loot or 185% Loot if you choose Garden biome, 25 Size or 20 Size if you have Map Reducer mastery, 75% Difficulty). You can simply smash the Create button with all sliders to the right until the achievement is rewarded. The map required for this achievement can be of any level, so you can make the lowest-level map to save fragments. Alternatively, you can first unlock the Perfect Sliders checkbox for Maps (reach Zone 110), then create a Map with all sliders moved to the right, then tick the box that appears. This will automatically create a perfect map.
Consolation Prize (Tier 5: 10% bonus)[]
There is 4.1% chance to get an Uncommon Heirloom in z146-165 Void Maps, and 2% for z166-180 Voids. You can't find Uncommons after zone 180. If the player has Fluffy level 1, this achievement will be automatically awarded.
Gotta Go Fast (Tier 6: 20% bonus)[]
First, you should have a bunch of levels in the Overkill perk. Then, you need to ensure that every world cell until zone 60 is overkilled. Farming maps for metal relatively often is recommended, for upgrading your attack equipment. If you look at the "World Cells Overkilled" under the Stats page you should get 50 overkills per world zone, so before starting a world zone export the game, run the game, abandon your Trimps as soon as you beat the boss, and check your stats to make sure you have an additional 50 overkills. If you didn't, import your save and go farm a metal map, then try again. You need exactly 2950 cells overkilled for this to unlock, so if you have something that allows you to overkill more cells, you need to remove them. Alternatively, if you don't want to remove them, you can liquify all zones from 1 to 59. This will also award the achievement.
Extra Crispy (Tier 6: 20% bonus)[]
Most people will get this on their first partial Spire clear, if they follow the common advice of inflating the breed time. Or if not the first partial clear, then the first full Spire clear. If you'd like to get it earlier, you can do so at any time after unlocking Geneticists.
Critical Luck (Tier 8: 80% bonus)[]
Get your critical chance as high as you can. Get a Plagued Heirloom with Critical Chance, the Charged Crits Mastery, Fluffy up to Evolution 4 Level 10 and attempt a Daily Challenge with increased Trimp Crit Chance. You need to get 10 red Crits in a row, so if your red crit chance is high enough (at least 25%), try idling in a low-level map until you have this achievement. This will probably be your last Tier 8 achievement, so don't feel discouraged if you can't get it early
U2 Hidden Feats:
Eliter Feat (Tier 10: 250% bonus)[]
Same as Elite Feat, but in Universe 2 with Radon.
Trivia[]
- In patch 2.72, Achievements were added.
- In patch 3.0, Heirloom achievements were added.
- In patch 3.2, achievements for Imploding Star were added, as well as 11 standalone achievements. Some of these standalone achievements are hidden.
- In patch 3.21, the fourth hidden achievement was added.
- In patch 3.6, 12 new feats were added, out of which 1 is a hidden feat.
- In patch 3.71, 8 new achievements were added (Helium Collection).
- In patch 3.8, 5 new achievements were added (Daily Challenge Helium Collection).
- In patch 4.0, 8 new achievements were added (Zone progression starting at Magma).
- In patch 4.01, a new housing achievement was added (Mass Generation).
- In patch 4.1, 15 new achievements were added in various categories. See the Changelog for more details.
- In patch 4.5, a new tier of achievements (worth 80% each) is added. 13 new achievements in this tier were added.
- In patch 4.6, achievements for later Spire speedruns and 12 new feats (1 hidden) were added.
- In patch 4.7, 12 new achievements were added (Helium Per Hour).
- In patch 4.8, 14 new achievements were added, including 6 feats (1 hidden).
- In patch 4.9, one new speedrun achievement for Spire III and 6 feats (1 hidden) were added.
- In patch 4.10, 12 new feats were added.
- In patch 4.11, two new speedrun achievements for Spire IV and five new speedrun achievements for Spire V were added. A tenth tier of achievements (worth 250% each) was also added.
- In patch 5.0, 59 new achievements (1 hidden) were added for Universe 2, as well as two more damage tiers.
- In patch 5.4, a new tier of achievements (each worth 1200%) was added. 4 new U2 Feats, 5 U2 Zone Progress achieves, 2 achieves for Mapless Drifter, Shielded, and Radon, as well as 3 speedrun achievements for the Trimple of Doom were added.
- In patch 5.5, 15 new achievements were added for U2.
- In patch 5.8, 22 new achievements were added, consisting of 12 Zone 300+ progress achievements, 5 new speedrun achievements for Spire VI, 4 new speedrun achievements for Spire VII, and a new Gem Collection milestone achievement, as well as reducing Stoned from 1 Million kills to 500K kills.